
How To - Standard Lines
The simplest way of managing food stocks is to have one single purchase line that is added to all food dishes at the correct cost for that dish. The following steps will describe how to create that purchase line and apply it to recipes.
-
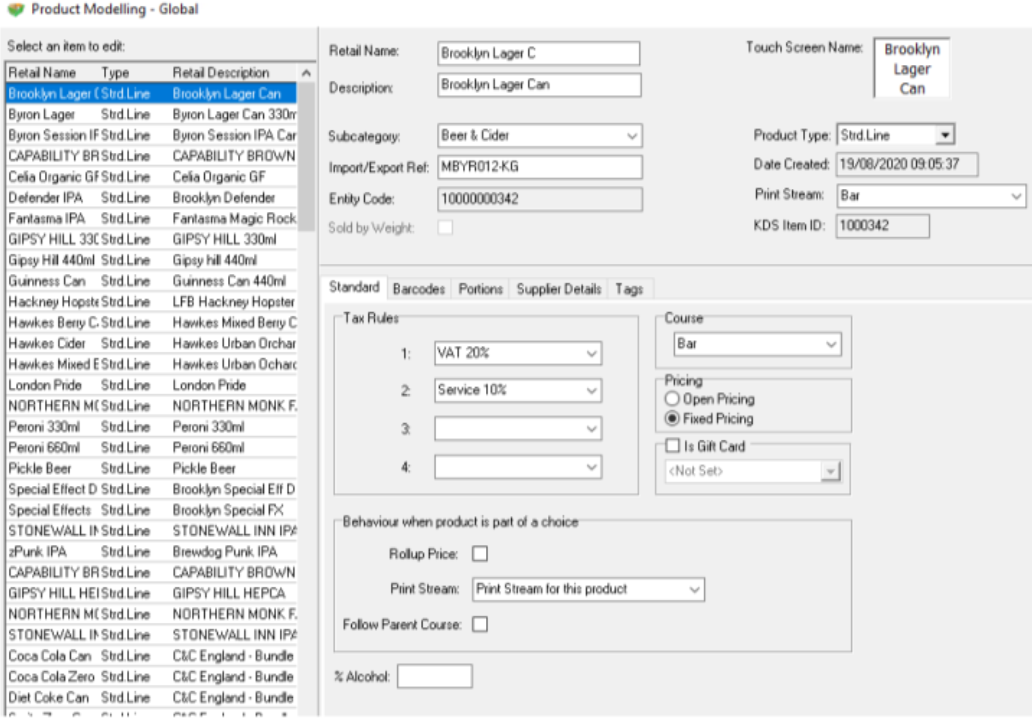
In Product Modelling press the Insert button and a new product will be inserted.
It is likely that as standard line items are always displayed first, the product type will also show as a standard line; drop down the box and select purchase line. -
From the sub category drop down box, select a sub category to add this new line to, e.g., 'Food Purchases'.
-
A screen similar to the below should now be displayed on your screen:
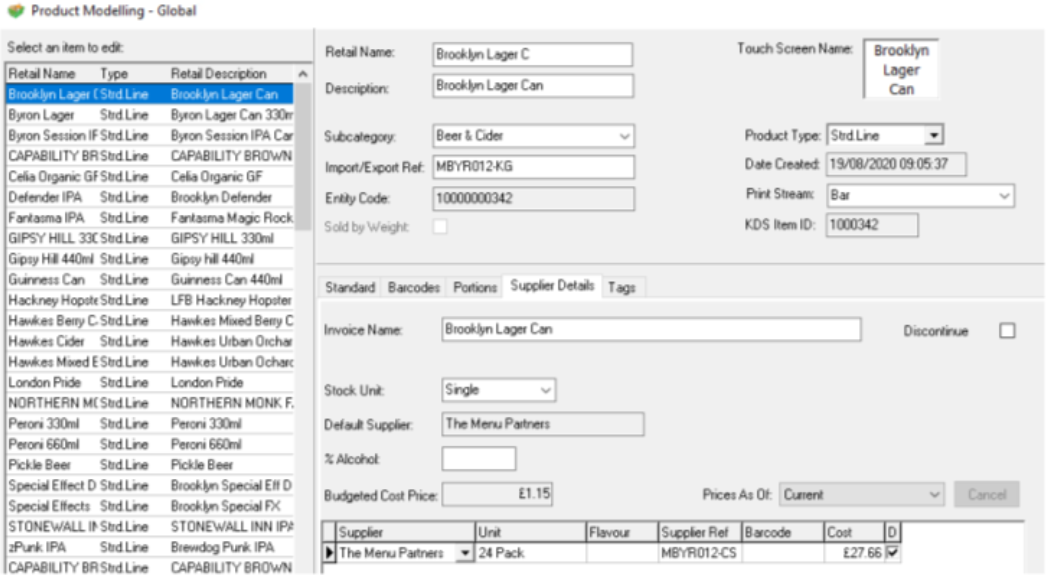
- Enter the name of the purchase line as “Food Purchase” (for example)
- Click into the supplier tab and select as the stock unit “Single or Item” from the drop down menu.
- Within the supplier section choose an appropriate supplier ; in this instance a standard name of 'food supplier' could be used
- Enter single or item for the unit and enter £1.00 as the cost price. This enables easy calculation of costs when inserting this purchase line into the recipe.
- Once the purchase line has been created this can now be added as an ingredient to all of the required recipe items.
- Click the Set Filter button
- Select the required sub category from the drop down and press OK - this will filter your food items and only show the required list of items you are going to be working with, e.g. main courses.
-
Select the first recipe line to add the food cost to
-
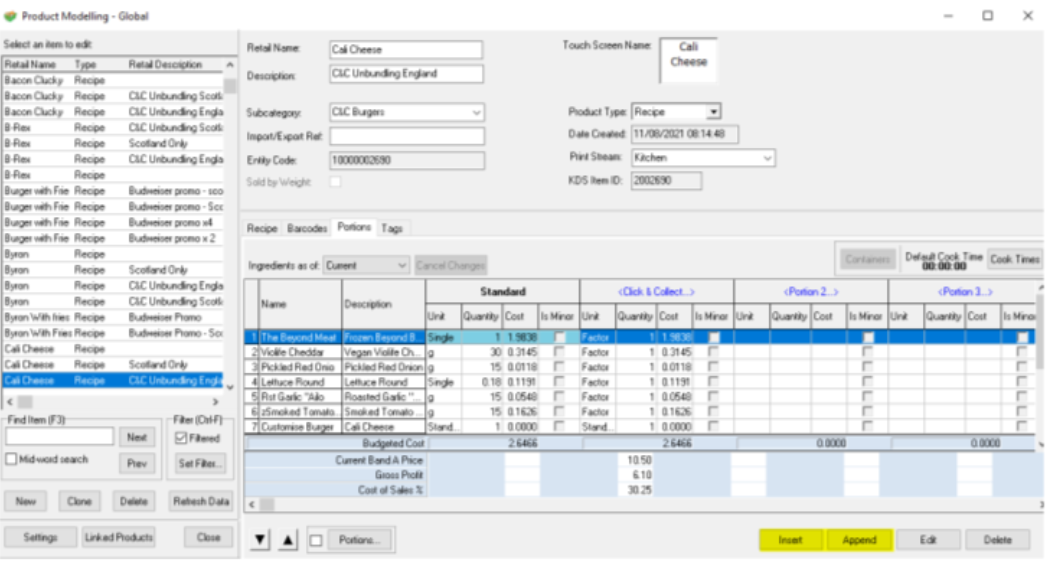
Click the portions tab which will display the portion and ingredients screen.
-
Click the Insert Ingredient button or press the insert key on your keyboard which will then bring up a list of all products held within Product Modelling.
-
Search for the food purchase line previously setup and either double click or press OK to insert this ingredient.
-
If there is only one portion in use (i.e. the standard) then the Edit Ingredient box will automatically appear. In the event that there are multiple portions, these should be edited after the ingredient has been inserted.
In this example a second portion is in use to allow main courses to be served with the starters and printed within the starter part of the kitchen order. Note that different portions can use the same or different quantities. - Click the unit box where indicated in the previous image, and either press the Edit Ingredient button or press the enter key on your keyboard.
- The edit ingredient box will then be displayed – by default for standard portions the unit type will always be populated
- Select the unit as either single or item.
- For the quantity enter the cost value of this dish (up to 4 decimal places can be used).
-
Where multiple portions are in use to populate the ingredient value press the Next button or use the keyboard shortcut of ALT + N to move to the next portion.
-
All other portions require the unit type to be included as part of the setup; select unit and fill the remaining two fields the same as the standard portion type, only changing the quantity if the cost price is different.
- Continue to add the food purchase line to all recipes that require a cost to be attached to them.

Remember that any sub category within the food division you are working on should have a cost price attached to all items, otherwise the food stock audit will not calculate stocks correctly.